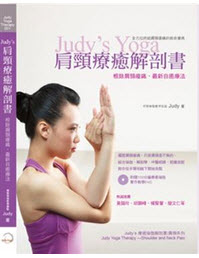
我们这群瑜伽爱好者,在一起练习时,大家都体会到瑜伽和健康的重要性,因此相约八月的第一个星期六,要在一起聚会讨论这方面的议题.时间是十一点半至两点,地点上次都提过.,因此,我先订定下一次研讨会的主题 ,根据大家受伤机率最高的部位--膝盖来做讨论,讲义是在yoga journal期刊上的专栏,其中有一篇特别探讨Lotus posture,他写很仔细,又有图片,网址如右:http://www.yogajournal.com/teacher/978_1.cfm (好像会跳掉,没关系,我附原文如下,这是教学用,不会侵犯著作权,大家有空可以多去这个网站汲取新知)
探讨盘腿为什么容易受伤,还好要如何调整盘腿的角度才不会受伤,其实人体各个部位的关节,在三十多岁以后就渐渐地老化,但你可能不自知,因为你尚未有感觉,只是觉得腿劲没有以前来得好,这也是我深深觉得暖身的重要,尤其,有些骨科医生甚至要求病人在尚未有严重症状时,爬山及上下楼时要戴护膝,为的就是减缓对膝盖的压迫.
如果,顺利的地话,我会邀请医师或复健师过来讲课,毕竟他们对这一方面比较专业,大家可以先看看讲义,再把它印下来即可,若万一他们时间没法配合,我就先去上课,问清楚相关细节,再整理中文讲义,当天由我主讲给大家听,希望大家的膝盖,会愈来会愈强壮.
回归医学,才是我的梦想.
judy
ps:大家一起想想还有那些动作是和膝盖有关的,可以回应,以便资料整理 ps:大家若有膝盖方面的问题可以回应上来,我会一并整理请教专家,若你也想参加,也可以回应上来,因为场地不大,所以有名额的限制,费用定在五百元以下,若医生肯来,最好,因为要付专家费.若不肯来,则费用订250元,场地费150元,现场讲义一份100元.
注意,要来的同修,请务必写”我要参加此一研讨会”才会先帮你保留名额,因为我们会保障先前一起研习的同学的名额,所以名额不多,先报名先参加,仅对外开放25个名额.
时间:8月5日(六)11:30~14:00
地点:梵瑜伽(捷运板南江子翠站四号出口即可看到,双十路上,可看右侧网站有介绍)
内容:讨论膝关节,以下面文章为主
人数:有限制,因场地不太大.
附中文补充资料
(以下资料是由sportsNT提供)
膝关节是由股、胫、膑骨等构成上下杠杆长,构造复杂,是容易发生损伤的关节。膝关节的主要功能为屈伸运动,在半屈或屈90度时有轻微的旋转运动。它周围的肌肉和肌腱,内、外侧副韧带,前、后十字韧带以及外侧半月半,共同维持膝关节的稳定性。
虽然股骨和腓骨上的强壮肌肉能帮助支撑身体进行多样的运动,但保持左右平稳必须要靠两条韧带。当膝关节旋转超过韧带限度时,软组织会首先受损伤,整个关节是由髌骨后滑囊中分泌的滑液来润滑的。大腿肌肉、小腿肌肉及与之相连的肌肉负责关节的活动,膝关节承受运动负荷产生的压力的能力取决于这些肌肉的力量。
田径运动中经常性的跳跃运动会导致膝盖囊炎(和瑜伽某些串连动作是一样的,也是大师兄所提到的问题.)。这是一种肌腱炎,液体分泌过多会造成滑囊炎;关节的滑动和不平稳常常导致膝关节习惯性脱位,单纯的膝部外伤或日积月累的许多小伤会慢慢的酿成骨关节炎、慢性疼痛和关节僵硬;相反,肌肉和关节长期不运动也会患关节炎。以上是一般性关节炎的受伤的原因。
学生的训练强度应由小到大,遵守循序渐进的原则。运动量大,强度小,转为量小强度大,此时,如果忽视训练中的循序渐进的原则出现训练强度忽大忽小,或长期保持较高强度,则会引起机体过度疲劳现象。有时因为气温的回升,运动员兴奋性较高,往往掩饰了机体的这种不适应的现象,因而在大强度中,容易出现膝关节的损伤。
结论和建议
结论
- 4.1.1通过自己的调查、访问找出膝关节损伤的主要原因在与专项动作技术不合理和准备活动不充分,以及过度的训练,训练安排不当。
- 4.1.2膝关节的确是经常易发生损伤的关节。在训练中我们要特别注意膝关节,防止膝关节损伤。
建议
- 4.2.1训练前必须作好准备活动,特别是下肢的活动,使膝关节运动灵活协调。
- 4.2.2加强肌肉力量练习,特别是股四头肌以及小腿三头肌与膀肌的力量训练,使之强健有力。
- 4.2.3做好运动场地的义务监督,避免场地因素损伤。尽可能不在崎岖不平的跑道上练习,尤其是进行短期的练习。
- 4.2.4当持久训练出现反应迟钝时,应终止基本部分练习。
 左图是右膝伸直,中间有髌骨patella,很多时候是patella角度跑掉,造成knee pain.右图是弯曲,可以清楚看到patella 和股骨femur的角度.

左图是右脚的解剖图,右图是膝关节的俯视图.
Protect the Knees in Lotus and Related Postures
By learning basic anatomical principles, you can teach your students how to safely open their hips without injuring their knees.
| Figure 1 Safe Knee Placement  View in Detail
|
|
| Figure 2 Unsafe Knee Placement  View in Detail
|
|
Lotus Pose (Padmasana) is a supreme position for meditation, and Lotus variations of other asanas can be profound. However, forcing the legs into Lotus is one of the most dangerous things you can do in yoga. Each year, many yogis seriously injure their knees this way. Often the culprit is not the student but an overenthusiastic teacher physically pushing a student into the pose.
Fortunately, there are techniques that make Padmasana much safer to learn. Even if you don’t teach full Lotus, you can use the same techniques to protect students in related postures, such as Ardha Baddha Padmottanasana (Half-Bound Half-Lotus Forward Bend), Baddha Konasana (Bound Angle Pose), and Janu Sirsasana (Head-to-Knee Pose). These poses can do wonders for the hip joints and the muscles around them. Unfortunately, many students feel a painful pinching sensation in the inner knee in all of them. To understand why, and how to prevent it, consider the underlying anatomy.
The problem starts at the hip joint, where Lotus and its relatives require an astounding degree of mobility. When you move from a neutral, seated posture, such as Dandasana (Staff Pose), to Baddha Konasana, the ball-shaped head of the thighbone must rotate outward in the hip socket about 100 degrees. Bending the knee and placing the foot in preparation for Janu Sirsasana requires somewhat less external rotation, but as a student bends forward in the pose, the tilt of the pelvis relative to the femur brings the total rotation to about 115 degrees. Padmasana requires the same amount of external rotation (115 degrees) just sitting upright, and the angle of rotation is somewhat different, making it more challenging for many students. When we combine the Padmasana action with a forward bend, as we do in Ardha Baddha Padmottanasana, the total external rotation required at the hip joint jumps to about 145 degrees. To put this in perspective, imagine that if you could turn your thighs out 145 degrees while standing, your kneecaps and feet would end up pointing behind you!
If a student can achieve all of this outward rotation at the hip in Lotus, they can then safely lift the foot up and across onto the opposite thigh without bending the knee sideways (see Figure 1). Some people with naturally mobile hips can do this easily, but for most people, the thighbone stops rotating partway into the pose. This limitation may be due to tight muscles or tight ligaments or, in some cases, to bone-to-bone limitations deep in the hip. When the femur stops rotating, the only way to get the foot up higher is to bend the knee sideways. Knees are not designed to do this-they are only designed to flex and extend.
If an overzealous student continues to pull the foot up after his thigh stops externally rotating, or if a student or teacher forces the knee downward, the thighbone and shinbone will act like long levers that apply great force to the knee. Like a pair of long-handled bolt cutters, they will pinch the inner cartilage of the knee between the inner ends of the femur and tibia. In anatomical terms, the medial meniscus will be squeezed between the medial femoral condyle and the medial tibial condyle. In layman’s terms, the inner ends of the thigh and shin will squeeze the inner cartilage of the knee (See Figure 2). With even moderate force, this action can seriously damage the meniscus. Such injuries can be very painful, debilitating, and slow to heal.
Poses like Baddha Konasana and Janu Sirsasana can cause similar pinching. In these postures, we do not usually pull up on the foot, so the problem comes mainly from the lack of outward rotation of the thigh relative to the pelvis. Let’s first look at Baddha Konasana.
Remember, to stay upright and stable while placing the feet in Baddha Konasana, the heads of the femurs will turn strongly outward-about 100 degrees-in the hip sockets. Because this requires so much flexibility of the entire hip region, many students instead allow the top rim of the pelvis to tilt backward while placing the feet in Baddha Konasana. They move the thighs and pelvis as a single unit. This requires little rotation of the heads of the femurs in the hip sockets, and it demands little flexibility. It also defeats the aim of mobilizing the hip joints and causes the entire spine to slump.
As a teacher, you may find yourself instructing the slumping student to tilt the top rim of the pelvis forward in order to bring them upright. If their hips are loose enough, this instruction won’t create a problem; the pelvis will tilt forward, the thighs will remain externally rotated, and the spine will come upright. But if the hips are too tight, the femurs and pelvis will roll forward as a single unit. While the thighbones rotate forward, the shins will not, resulting in the aforementioned pinching in the inner knees. This explains why some students do not feel any knee pain in Baddha Konasana until they attempt to tilt the pelvis completely upright.
Some students complain of knee pain only when they bend forward in poses that require external rotation. That’s because a forward bend like Janu Sirsasana demands even more external rotation at the hip joint. Again, in the tight student, the pelvis and femur roll forward as a single unit, pinching the inner knee. Of course, in either Baddha Konasana or Janu Sirsasana, pushing the knee(s) downward makes the problem worse, because tight muscles make the femur rotate forward as it is pressed.
Now back to Lotus Pose. Forcing the knees into Padmasana by lifting up on the ankles can also injure the outside of the knee. When a student lifts the shinbone without adequately rotating the thigh, it not only closes the inner knee, it opens the outer knee, overstretching the lateral collateral ligament. If a student then forcibly turns the feet so the soles point upward (which people often do to get the feet higher up on the thighs), they can worsen the strain. This action of turning the soles actually pulls the anklebone away from the knee, creating a chain reaction all the way up to the lateral collateral ligament.
What’s the solution? First, use common sense. Never force a student into Lotus or related poses, and discourage students from forcing themselves. Teach students not to push into pain, especially knee pain. Do not adjust the pose by pulling on the foot or ankle, nor by pushing down on the knee. Instead, either teacher or student should apply firm outward rotating action to the thigh, turning the femur around its long axis, using the hands or a strap. (For full instructions on how to do this adjustment, see the sidebar.)
If your student already has knee pain but can do basic standing poses comfortably, teach these poses first, with careful alignment. This can bring her a long way toward recovery. When you reintroduce problem seated poses such as Baddha Konasana and Janu Sirsasana, use the hands or a strap to apply the same outward rotating action described above for Lotus.
For students who are ready to learn Lotus, introduce it gradually, working from poses that require less external rotation at the hip (such as sitting in Ardha Baddha Padmottanasana without bending forward) to those that require more (such as full Padmasana). Wait until last to introduce poses that require the most external rotation (forward-bending variations of full Padmasana). As students are learning these poses, teach them to rotate their thighs outward either with a hands-on adjustment or a self-adjustment. Instruct them to monitor and avoid pinching sensations in the inner knees.
Encourage your students to go slowly, be patient, and persist. In time, they may be able to sit comfortably and meditate deeply in Padmasana. If not, remind them that true meditation lies not in some specific posture but in the spirit of their practice. Help them find a posture that suits them, then guide them to settle in and experience the stillness that is yoga.
Adjustment Instructions
It’s always a good idea to ask a student for permission before you do an adjustment. You can perform this one with or without a strap. (See Figure 1 to view strap placement.)
To begin, kneel behind and to one side of the student. To do the adjustment manually, grip the upper one-third of the thigh with both hands and turn it firmly outward. To use a strap, encircle the upper one-third of the thigh with it once or twice. Pass the free end through the buckle the first time around. When you’ve finished setting up the strap, make sure that the loose end is to the outside of the thigh, so that pulling outward on the strap will externally rotate the thigh.
Use one hand to pull firmly outward and slightly downward, being careful not to force the knee downward. Place the other hand on the back of the pelvic rim and use it to prevent the pelvis from tilting backward. While adjusting, ask the student for feedback and heed what he says. Watch his facial expression and look for signs of relief, not discomfort. When done correctly on a healthy student, the rotating action can be quite strong without causing injury.
[……]